Roland D-20 Battery Change
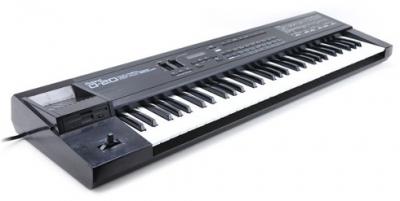
Roland D-20 Synthesizer
Roland has a backup battery in a lot of their systems that saves your sounds and your changes to those sounds in the synth’s memory when the unit is off. They suggest that you have the battery changed every 5 years or so, and here I am 20 years later. I have to say, I was getting Check Battery messages, but it was still working and saving data.
So after looking for a LONG time online for model-specific info, instructions or moral support for changing a Roland D-20 battery, I found a few pieces of good advice, with most everyone else ignoring the D-20 and talking about the D-50 or D-110 instead. So to contribute to future D-20 battery changes, here is my own description of the process.
In my past I have been heavily involved in computer technology. It is very important that you be somewhat comfortable opening up your keyboard and poking around inside if you’re going to change your battery. If not, I strongly recommend you find someone to do this for you instead.
You will need to get yourself a 3-volt 2032 Lithium battery to put in your keyboard. You can probably find these at your local drug store or online. You should also have a backup card to save all sounds and rhythms, as once the battery is removed you very well might lose all your sounds. The original cards for the D-20 are no longer available, but you can use a Roland 512-G card to save everything, it works just like the old memory cards. I got mine from Voice Crystal at http://www.voicecrystal.com/roland.htm. You should also have a demagnetized phillips screwdriver, which you can usually find at your local computer or hardware store. It actually might not matter, but I tend to play it safe with electronics.
First: make sure you back everything up on your card. When you’re done, turn off the keyboard and unplug it.
Turn the keyboard over and place it on the floor so the back of the keyboard is facing you (the keyboard label and all the ports are facing you), and get a book or two to prop it up so the pitch bender lever doesn’t get broken on the floor. Remove all the screws from the bottom of the keyboard, apart from the ones which hold the rubber feet. Now remove all the lower screws on the back of the keyboard, i.e. those farthest from the floor. I think it’s about 6 or so. These hold the back of the bottom plate on the keyboard.
Carefully lift the bottom off the keyboard and set it aside. First thing to notice is the power supply on your lower right. DO NOT TOUCH IT. Fortunately, the battery is on the opposite side of the unit, so you shouldn’t need to even be near it. These things hang onto power for a long time, and you can receive a very serious shock if you touch it, so please just stay away from it.
You should see the battery in its holder on the lower left. It is just held in there with a little retaining clip. Mine had a little black plastic knob on the clip which I just propped up and carefully slid the battery out. Now it is just a matter of lifting up the clip and sliding the new battery in. Make sure it’s fully seated in the receptacle.
While you’re at it inside the unit, it’s a good time to clean out any excess dust.
The hard part is over. Now you just place the bottom cover back on the keyboard and make sure all the screw holes line up. Start by putting the screws back on the back plate. After that, you can put in the screws on the bottom of the unit. With all the screws, you should be only hand-tightening; don’t over-tighten them. They should be snug and not able to come back out.
You’re all set! Plug it back in and reload any data from your backup card that might have been lost with the battery change. I actually didn’t lose anything on my change, but it is better to be safe than sorry, especially if you have a lot of custom sounds. Hope this helps anyone out there searching for how to do this.